
If you’ve used the Arduino from the previous posts, you’ll have no problems using a Raspberry Pi, which is much more like the computer you use everyday. I used one I had from a previous project, which is a Model 3B+. We’re currently looking at a model 5, but that is much more than you need right now. Use what you have or get what you can, but don’t stress too much if it is an old one. Mine looks like this:
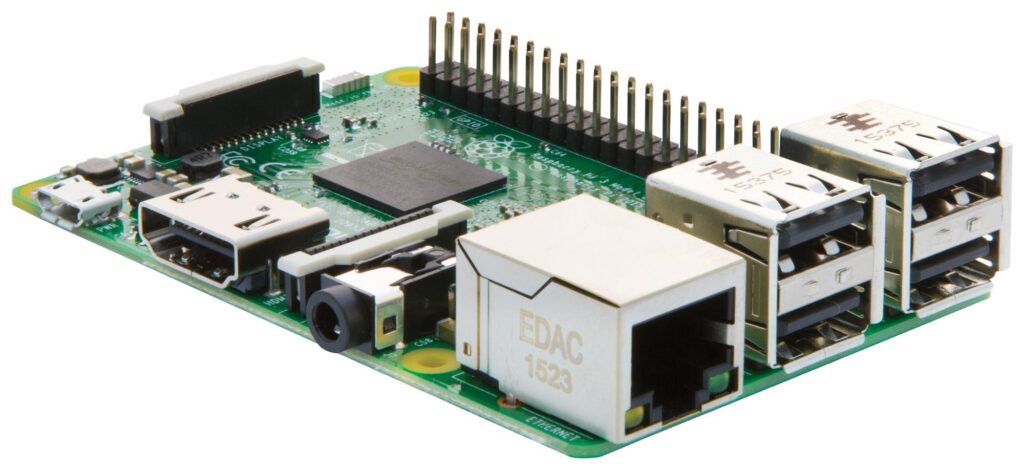
If you’re new to Raspberry Pi, it looks complicated, but isn’t. You’ll recognise many of these sockets already (L to R): 5V micro-USB socket for power, HDMI socket, 3.5mm audio socket, network port, and four USB-B sockets. The spiky pins on top are the General-Purpose Input/Output (GPIO) pins. These are programmable pins that can be configured as inputs to read sensors or outputs to control devices like LEDs, motors, and relays. More of this in future tinkering. These may be new to you, but the rest, you know already.
The Shopping List
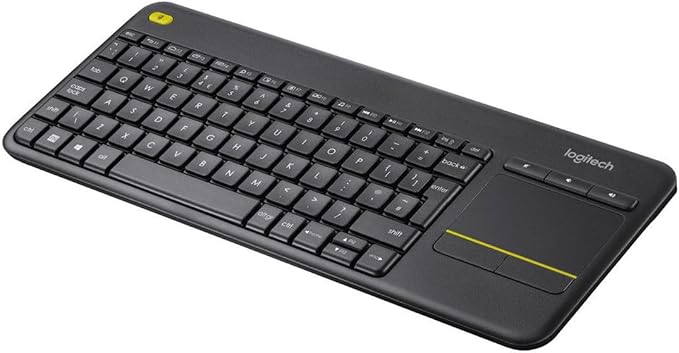
When buying a Pi, you may likely also need a HDMI cable, a USB keyboard and mouse, and monitor too. I have mine plugged into my TV in the living room, and use a Bluetooth, all-in-one keyboard and pad, like the one opposite. It means I can sit with my feet up and use it. Plus it only uses one USB socket for its dongle.
You may be able to get things like keyboards and mice from friends and family. Oh, and unless you prefer the look of a delicate and bare circuit board, you’ll probably want a case to house it in. They are often easy to take apart so you can get access to the GPIO pins. Pick one that suits your vibe.
Don’t forget an SD card; aim for 32Gb as a minimum. Get a good one such as ‘Class 10’ or ‘U3’, as it can make a big difference to how fast your Pi runs. As the humble Raspberry Pi becomes more powerful, it demands power supplies that output more watts, so check which one to get for your setup. Check what you need from the Getting Started page.
Getting Up and Running
Once you have your Pi and bits ready, you’ll want an operating system. The simplest way to get up and running is to set up your SD card on another computer. Visit the software page to download the Raspberry Pi Imager. Install that on your computer, insert your blank SD card and install the appropriate version of Raspberry Pi OS (Just go with the “OS Full” version). It will take a short while, but is easy to do. When it’s finished, pop the SD card into your new Pi, plug in your cables, and plug in the power last. this will finish installing your operating system. Answer some questions, and it will eventually show you a desktop that looks more familiar. (If you struggle to get the whole desktop to fit nicely on your TV, change your TV setting to disable something called ‘Overscan’, which stretches the picture to remove any space around the broadcast picture. You should see it all now.)
You can use your Pi like a normal computer, but instead of it running Microsoft Windows or iOS for Mac, you are running a version of Linux. It’s free, very powerful, and yet developed by the community that use it. It does what your regular computer does, but your applications may have different names, such as the Chromium web browser, VLC media player, and the Thonny Python environment. It also includes the LibreOffice suite, KiCad, a programming environment for Scratch, and many other applications. The best things about Pi OS is that you don’t need a lot to run it on, and you can control all the bits; ‘delving beneath the hood’, so to speak.

First Steps in the Command Line
Just like a normal computer, you should update it regularly. Once you’ve connected it to your internet (Look in the top-right corner), you may get a message recommending you have updates, but let’s have a play with the ‘Command Line Interface’ (CLI), where the fun starts.
Now you can make mistakes to a certain degree. If you type something wrong, it won’t understand it, and won’t guess what you’re trying to do. However, you can easily delete files that are important, especially when you are using the command sudo or ‘Super-User-Do’, which could mean you need to reinstall your operating system using the Pi Loader, like you did in the first place. That could mean you lose everything you produced on your Pi, and you have to start again from scratch. I have warned you.
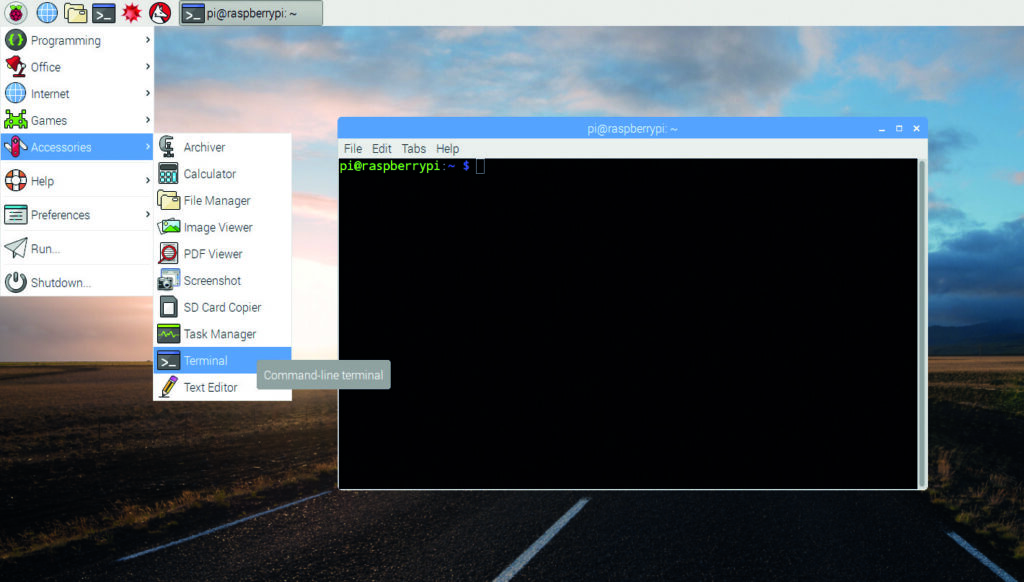
Open the Terminal by clicking on the icon in the top-left corner, via the menu as demonstrated below, or by pressing Ctrl+Alt+T. You will have a window open that has all text and a black background.
The Raspberry Pi terminal (or ‘shell’) is for managing files and controlling the system. It runs Linux commands, such as those listed below, to navigate directories and configure hardware like the GPIO pins.
- pwd Print Working Directory—shows where you are.
- ls List files and folders in the current directory.
- cd <directory> Change directory.
- cd.. Go back to the folder this folder is in.
- sudo <command> Run a command with administrative (superuser) privileges.
- sudo apt update / full-upgrade Update your system.
- pinout Displays a labelled diagram of GPIO pins.
- hostname -I Shows the IP address of your Raspberry Pi.
- rm <file> Remove (delete) a file.
- clear Clears the terminal screen.
- reboot Reboots your Raspberry Pi.
- exit Closes the terminal window.
- Oh, and pressing the ‘up arrow’ on your keyboard will scroll through the commands you’ve previously used, just in case you need to repeat one, or more likely, edit the mistake you made in the last line without typing it all again.
We’re going to update you Pi using the Advanced Package Tool (apt), which stores a list of software sources. Before installing any new software, run the following command to update your local list of packages:
sudo apt updateIt will check what is available online to what you have, and update the list so it knows what to update and what is new. Once that is run, you are going to update all the software that apt lists as requiring an update. Enter the following command as it is written:
sudo apt full-upgradeSometimes you may want to install new software packages and you can do it using the following command, inserting the name of software where you see the < and > symbols:
sudo apt install <package-name>When it does this, you will see that it also checks for any packages of code that your new software will need in order to run. These are called ‘dependencies’. It will also install the thing s you need to make it all work.
You can also search for software and packages via the desktop environment. If you know what to search for you can click on the Raspberry Home icon in the top-left, select Preferences, then Add/Remove Software. If you fancy browsing for your software, use the Recommended Software option from the Preferences menu.
For now, this is as far as we need to go. If you want to know more about the way that Linux commands work, by all means get a manual, or search the net for it. You can even find yourself creating scripts of commands chained together that you can run from the CLI. Imagine automating your own commands and contributing to the software in the future. If you are itching to try that then try these exercises that will get you creating scripts very quickly using the Pi’s textedit software called nano. It will take you through creating an executable file that can ask for information, use variables, make decisions, carry out mathematic functions, and provide an appropriate output.
However, right now, we’re getting ready to look at how we get this Raspberry Pi doing our spectral analysis of the radio frequencies we explored in the last post.