
Part three is here! We’ve explored spectral analysis on a vigil using a dedicated piece of portable kit; set up a Raspberry Pi; now we’re going to explore using a spectrum analyser on that Pi. Why? Well you were going to get a Pi anyway because you’ve been excited to learn more programming skills and continue your electronics engineering hobby. While not doing any soldering or programming today, you’ll be installing software and exploring it. Besides, if you already had the Pi, this can be cheaper than buying the Seesii spectrum analyzer [sic] that I bought (and that was the cheapest one they made).
Shopping List
A Software-Defined Radio (SDR) means that the physical components that make up an actual radio (e.g. mixers, filters, amplifiers, modulators, demodulators, detectors, etc.) are made of software on a computer. But for this project we still need the hardware though.
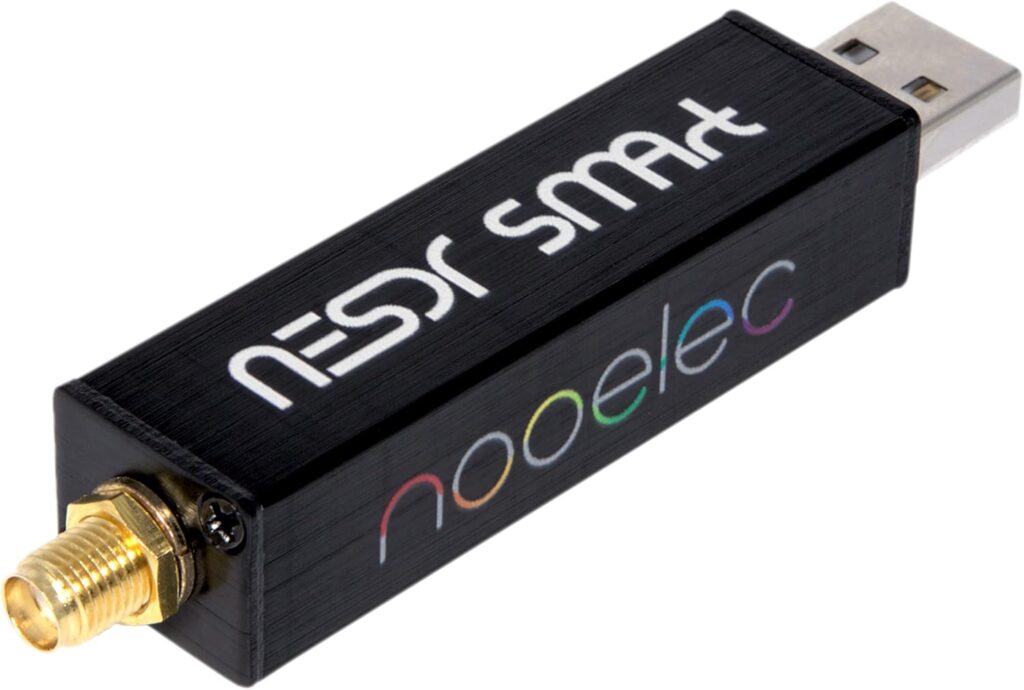
I got a NooElec RTL-SDR NESDR SMArt v5 HF/VHF/UHF 100kHz-1.75GHz dongle. It has a USB plug on one end and an aerial socket on the other. If you buy it on its own, it doesn’t come with an aerial, but you can get a bundle where it comes with three.
If you are feeling flush, you can choose to spend extra and get the ‘Ham It Up’ bundle enabling you to get enhances reception in the High Frequency (HF) range. Obviously it’s lot more, and could open a rabbit hole of you wanting to get a balun (‘balanced to unbalanced’) aerial, which is normally placed ten to twenty foot away from your receiver, and could be many metres long. top tip: Get permission from the people you live with before they complain about the wires everywhere.
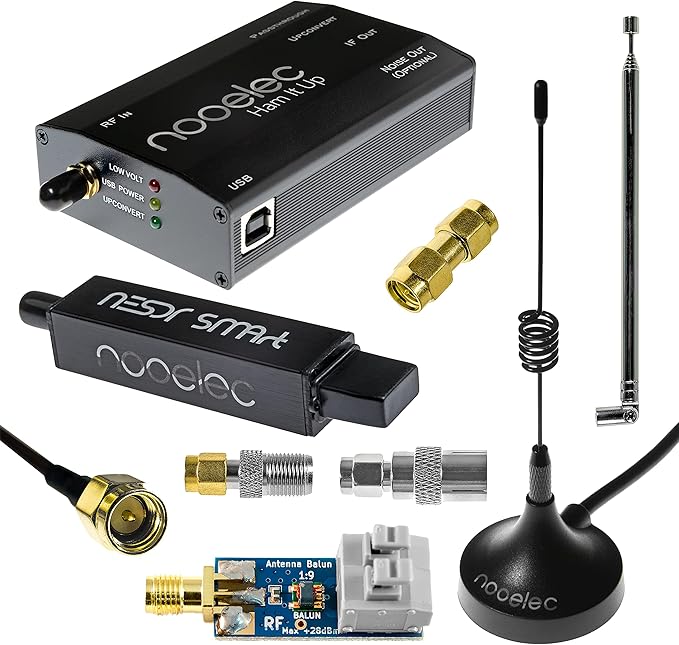
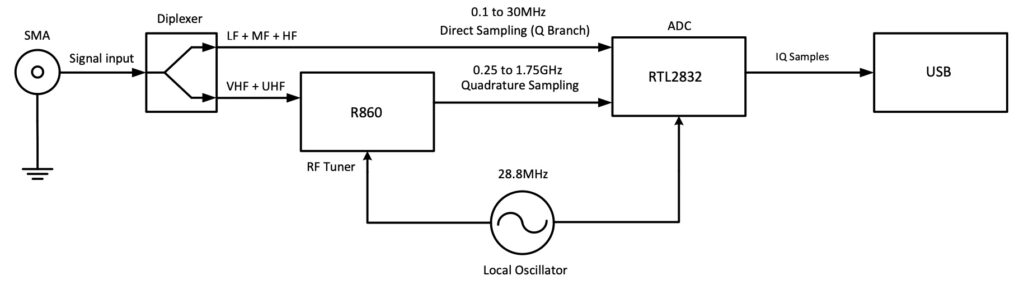
For now, just get the basic one, as I’m only going to get you started with that first. We’ll get to the HF ‘Ham It Up’ bits in a future post. Famously, NooElec provide pretty much no instructions on how to use their kit, but they do provide a schematic if you are wondering what you’ve bought.
The Software
The software is GQRX, a free and open source SDR receiver. The creators of GQRX point to other nerds who insist that the Wikipedia page for software-defined radios is excellent. They lie; it’s an overly complicated trawl through complex stuff you don’t need yet, or probably ever. I’ll lead you through installing it and getting going.
Don’t plug your SDR into the Pi just yet. Open the terminal, and update your Pi like we did in the last post. Next we’re going to install the RTL-SDR packages so your Pi can recognise what is plugged in. You know what ‘SDR’ stands for but the ‘RTL’ bit just stands for the Realtek RTL2832U chipset that your dongle uses. Type:
sudo apt install rtl-sdrThat shouldn’t take long, and we might not even need to do it. Installing GQRX may recognise that the rtl-sdr library is a dependency for it to run and will install it if it isn’t there. It’s okay to plug in your SDR dongle now, remembering to plug in your aerial. The telescopic aerial is fine for what we’re going to look at first. Next, we can install GQRX.
sudo apt-get install gqrx-sdr(apt-get automates the process of downloading, installing, and upgrading software from online repositories.) This may take a little while, and once it is done you will have the opportunity to type at the command prompt again. Probably best to reboot your Pi so type:
rebootWhen you’ve got back in you can select GQRX as a program to use from the Start > Sound & Video > GQRX and it should open up.
Using GQRX
The first thing it will do is get you to configure your I/O devices. Just go to the top box and from the drop down list select your Nooelec NESDR device, then click OK to get to the main screen.
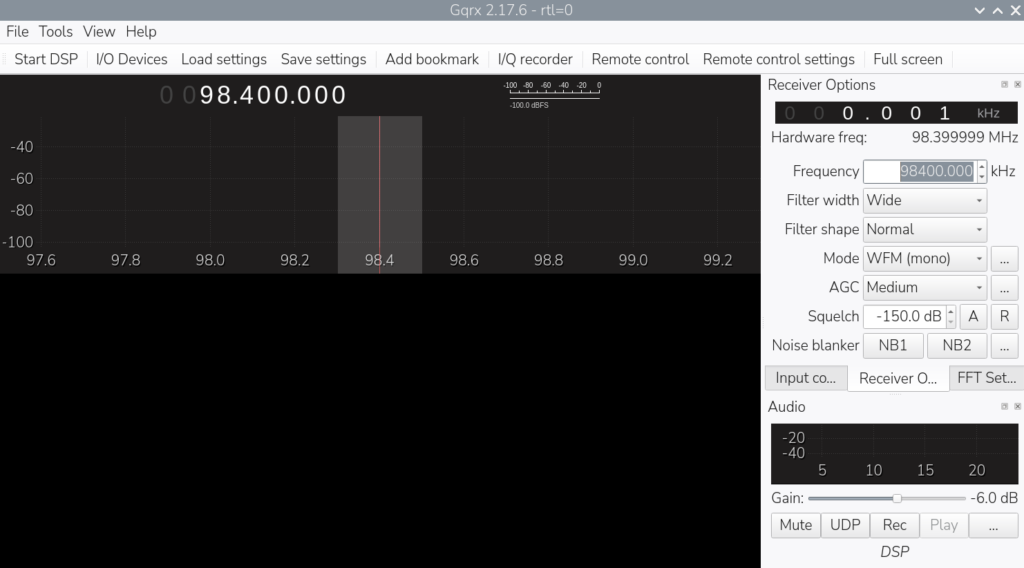
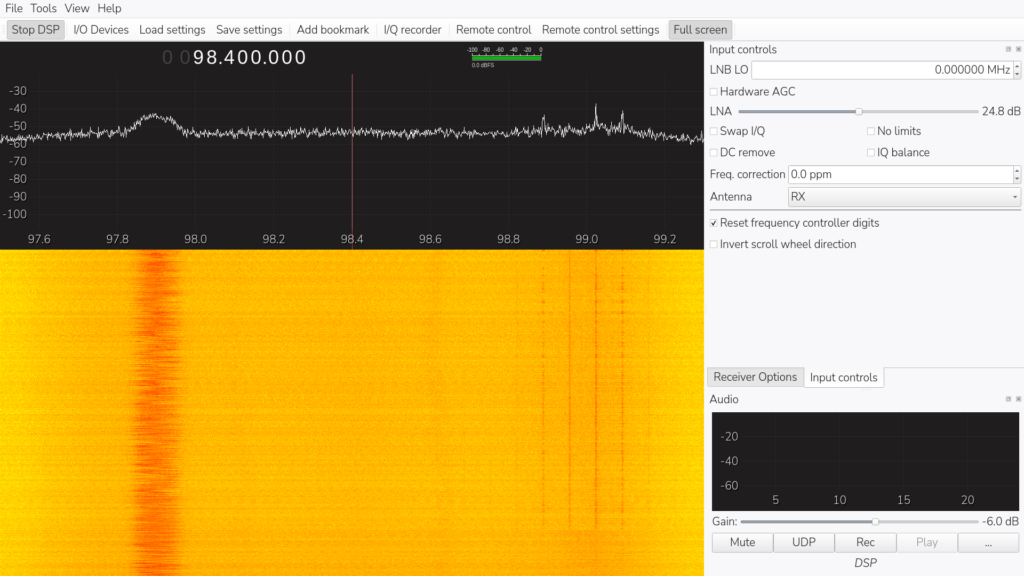
You’ll see nothing is happening; no wavy lines or waterfall. You will notice that there are number across the bottom of the graph though, and on the left you have some options for tuning your receiver. Click in the first selectable box called Frequency. I’m going to choose 98.4 FM as a place to put in the middle of the display, but it wants it in kilohertz, so that would be 98400.000 kHz. You’ll notice that unlike the Seesii, we can only display 2.4 MHz on the screen at one time, but we do get a nice refresh rate of peaks displaying. If you bought the much more expensive version of the NooElec, then you would see twice that width. Anyway, press Enter and you will see that your red line is over that frequency.
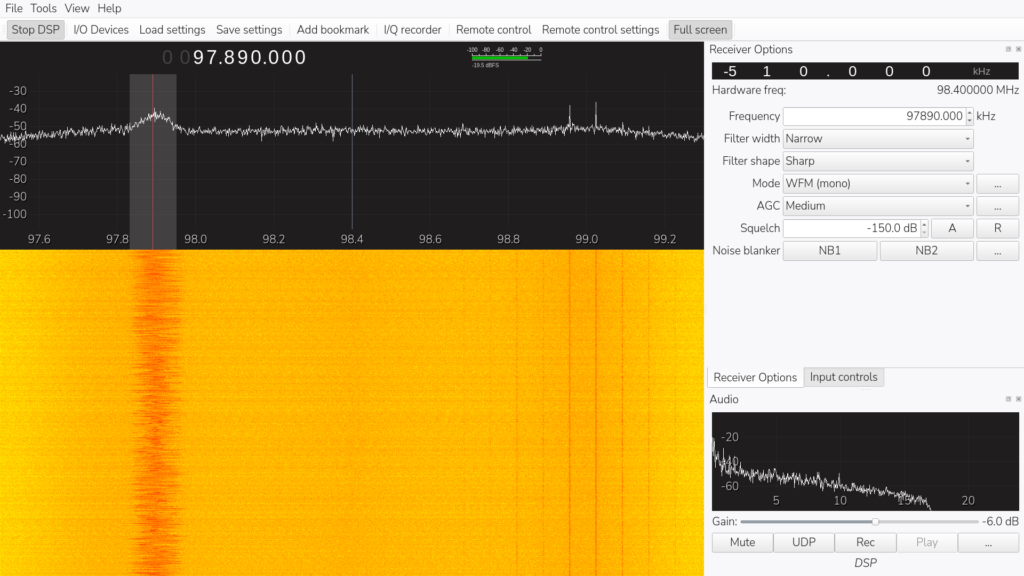
Let’s start this thing. Click on the ‘Start DSP’ (stands for ‘Digital Signal Processing’) button in the top-left hand side. Hopefully, you will see your wavy line on the screen as well as. You will see your waterfall appear too. This is that section of the band being received over time. Depending on your aerial you may have multiple signals. Those signals don’t look huge do they? But which one looks nice a wide? In your window with the wavy line, drag the red line to be where the best peak is.
Now revisit your Receiver Options panel and change the Mode to WFM (mono). If you’re in the UK, you’ve just located your regional Radio 1 station, which should exist somewhere between 97 to 99 MHz. If you can’t hear it then right click on the speaker icon in your top bar and select an appropriate output for you audio; it may have been set to the AV Jack by default. If you have your Pi plugged into the TV, select HDMI.
Tinker with the settings until it sounds better, which might mean narrowing the filter width, or trying different values for Squelch. Squelch is a filter that mutes the background noise when there is little signal so you don’t have to listen to white noise. Too high a number for squelch and you will limit which stations you can hear. Now it’s time to start exploring other frequencies. Look back to the first post in this series to try different values for frequencies, and then change the mode to suit the band you have arrived at, such as AM.
In Summary
Sure this isn’t as portable as the Seesii Spectrum Analyzer, so is unlikely to be used on a ghost hunt, but will no doubt lead to more exploration, and you will become more confident using software and hardware solutions combined to discover what is out there in the radio frequency spectrum. The strength in exploration here is choosing the correct style of aerial for the signals you want to tune into. For HF frequencies (3 to 30 MHz) you’ll definitely benefit from a balun aerial, which should be enough to have you delving into the mathematics and electronics of what sort and how long it should be to obtain a certain frequency you want.
However, you’ve also got a Raspberry Pi set up and you have started getting confident in operating it. Have you considered whether you can use your Pi to collect other data such as the temperature? It’s probably something much more useful than using a laser one when you’re on a ghost hunt. That kind of project is just a click away. (The many, many books can be a bit patchy, so why should you buy one when you can get that sort of quality project for free? Pi projects will soon have you learning how to code in ‘python’, but that’s fine. Once you learn one computer language, the next one is easier to learn. If you’ve been following these spooky projects, you’ve already done a bit of coding in C, linux, and next will be python. For now, happy spectral scanning.