So, in a fevered dream the other day, I was wondering whether I could streamline the tech required to deliver my most recent show. The element that fell under investigation was the live feed of the IR camera to the audience. Firstly, let me explain what that workflow looks like.
At the business end of the chain, there is the camera, which has had its infra-red lens removed. I wrote about how to do that here, so take a mooch if you want to explore that first. However, to get this live feed on to the projected screen, so that the audience can see it and become immersed in the experience, requires a little work.
The image opposite shows how the first half is done. The IR camera is the blue bit, which sits next to an IR light. All this is mounted in front of an iPhone SE (1st generation), which runs an app called LiveCam, which provides a fullscreen monitor without all the buttons and numbers, etc, that the traditional iPhone camera app displays.

Why use the iPhone, I hear you ask? Well audience members will be walking about in a blacked out room, relying on only the iPhone screen to see. As this room is away from the stage, I need it to be remote and without any trailing wires. So I use the wireless screen mirroring option built into the phone, which sends a live feed from the phone to an Apple TV box on the stage. This in turn, has a HDMI output, which plugs into an ATEM Mini HDMI switcher.
This last bit of kit allows me to have several HDMI inputs, such as the other iPhone SE, which I use to broadcast the EMF meter, or the anemometer. I also run a laptop into this, which looks after the Kinect software. The output from this ATEM box is a USB webcam feed that goes into PowerPoint on my Mac. The live webcam feed is embedded using the Cameo. That’s how the whole show tech is set up. Anyway, the iPhone camera focuses on the rear screen of the IR camera, and this is the bit that I find to be the weak link from a visual quality perspective. It isn’t great. Why can’t I just get the feed from the iPhone?
Disassembly
Let’s look a little more closely at the iPhone cameras, front and back. The front camera is the one you use to unlock your screen, and does the facial recognition element of unlocking your phone. As such, it has a more ‘generous’ IR filter, so that it can capture your facial features. The one on the back (the better camera), has a filter that is a little stricter. Sure, if you fire your TV remove control directly at it, you will no doubt see a flashing light. IR is really useful for autofocus, so it needs to let some of it through to the actual CCD sensor. But is doesn’t let enough through that would enable the audience to see in the pitch black environment of that part of the show.

Usually, the IR filter is a physical piece of glass, but you can imagine that Apple, (a company known for never being happy until their products are unserviceable, I mean, compact), wouldn’t just cut a corner like that. While the glass from most lenses can be easily removed, Apple have ensured their iPhone camera is as streamlined as possible.
You can understand why I wanted to do this. If I could remove the filter from the phone camera, I would be able to broadcast direct from the iPhone camera, without it going via the cheap IR camera I made earlier. It was all a bit cobbled together, whereas a direct IR feed from the iPhone would be much clearer. So, “Hello, Google”.
Bit of research later, and it appears nobody has ever done this. Sure, they’ve thought about it, but then haven’t told anyone what the’ve done after asking the question. Before I savaged my phone and butchered the camera, I bought a spare camera unit and attempted disassembly of that. Again, there were a few ideas on how to do it. These things are TINY!

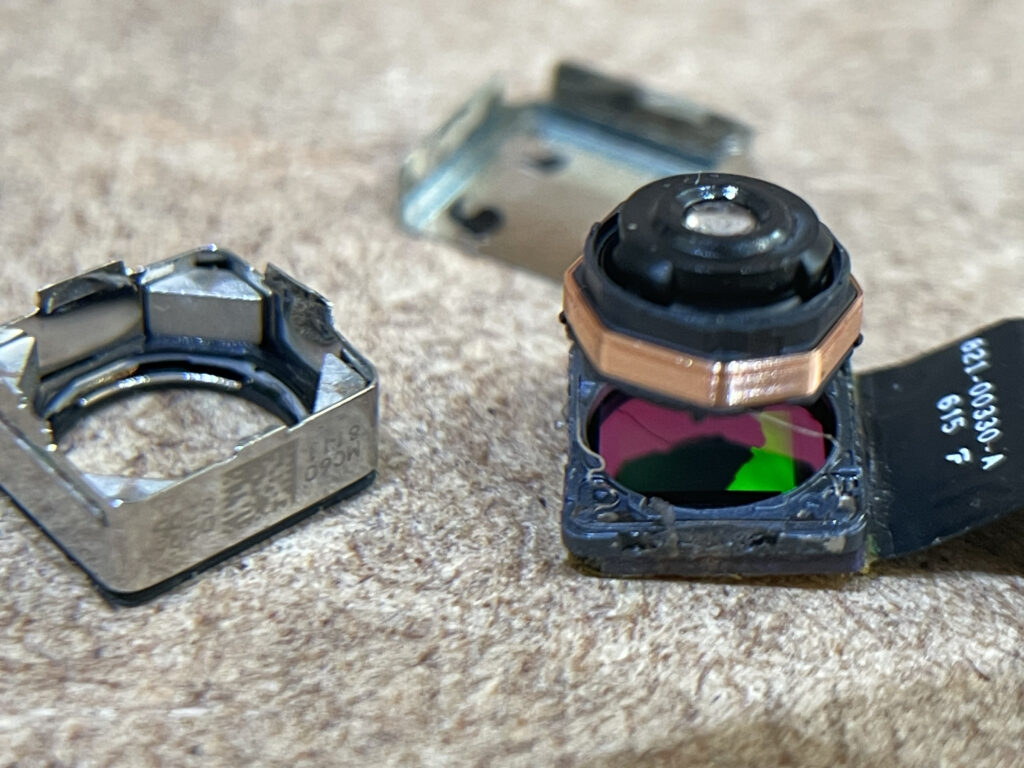
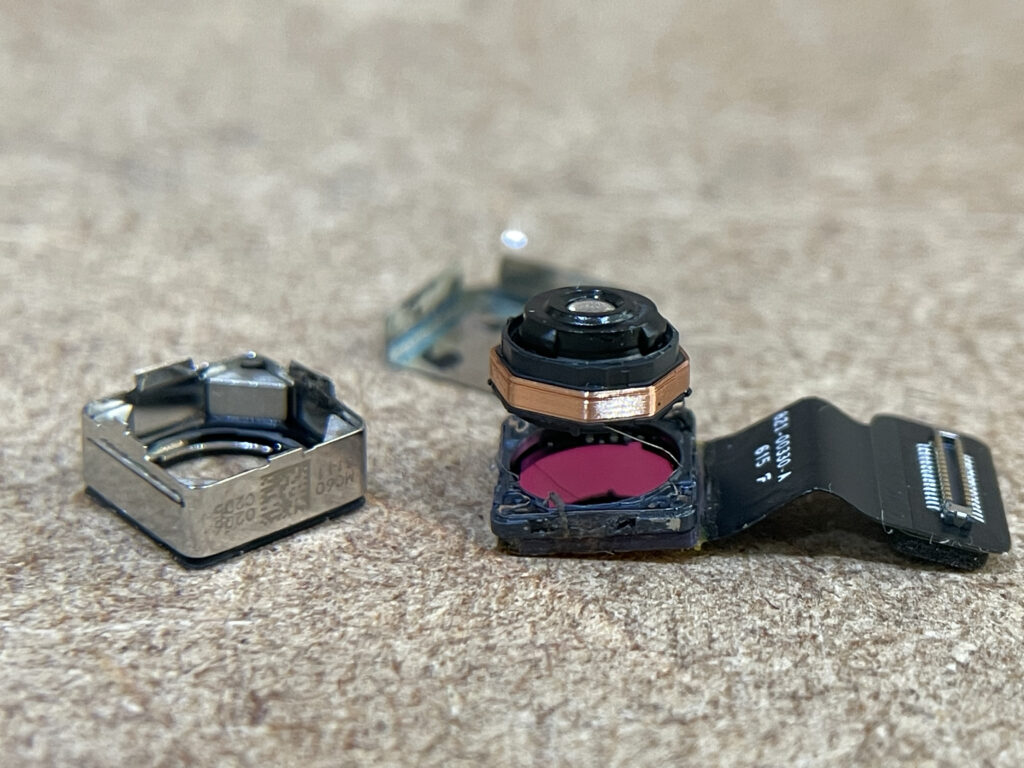
Yet, it turns out that it’s not too difficult to take them apart. The metal bottom is only lightly glued on and so it the metal top. I held everything in place using a magnet, but I needn’t have worried, as nothing fell out. You still need to be very careful though, the top, autofocus lens element is held in place by very fine wires that feed the coil. On reflection, I’m unsure what damage the magnet will have done to the rest of camera. The whole thing is now quite well magnetised, so is probably ruined anyway.
Looking down through the top lens which contains the autofocus coil element, the lens is completely clear and contains no IR filter element. However, you can see how the purple IR filter is embedded adjacent to the sensor. The sensor is the square, green thing visible through the purple-looking area in the left picture. (You should be able to open the images in another tab to get them full size).


I’ve done this, just in case you want to try. This isn’t to say that not all iPhones are the same. Later generations may be different. Oh, and the reason I didn’t use iPhones older than the SE is that the iPhone 4 did not do screen mirroring. If you have other solutions then please feel free to get in touch and we can chat nerd things.
Well, while we’re here…
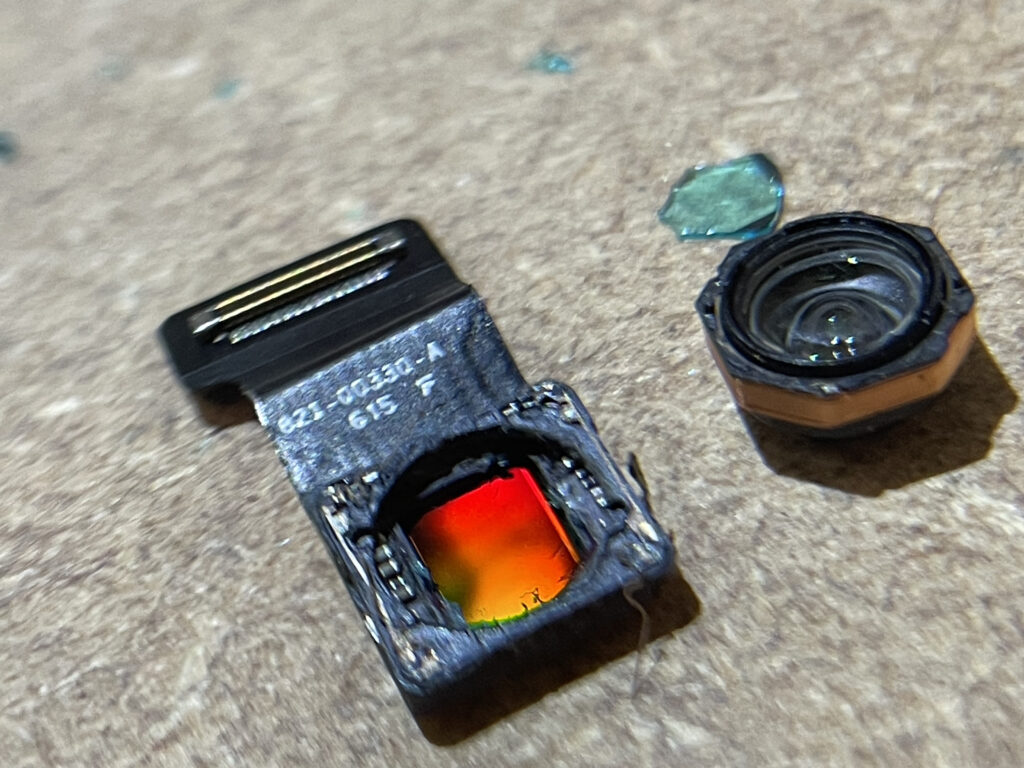
I just had to. While I had it open, I had to explore more fully. I was correct, it’s not easy to do it, but it is possible. And yes, you will probably destroy the sensor too.

Remove that purple square of glass (it’s actually green, and very brittle) using a scalpel and you will get to the sensor, without the IR filter. Will it ever work again? No, you can see where I scuffed the sensor without even zooming in. Can I reassemble it? No. But I’m not going to give up. It looks possible to desolder the top mechanism from the section with the sensor, which is kind of useful to get the filter out. It may be that a heat gun will loosen the filter, and it will drop out more readily, and without having to get a scalpel near the very delicate sensor. Either way, nobody wants any broken glass falling into the sensor anyway. The upshot is that filter is NOT attached direct to the sensor, but it’s very close, and the fine connections to the autofocus mechanism may require careful removal to (possibly) melt the lens out. Over to you.
